In the following article, I will describe one of the approaches to successfully migrate a single EC2 instance running on AWS to Google Cloud.
AWS EC2 environment details
I had a self-contained WordPress instance (LEMP) running on EC2 on a ubuntu 20.04 instance.
In order to migrate the instance to Google Cloud, the following high-level steps are to be followed
- Create an AWS AMI for your EC2 instance and convert it to a VMDK (Virtual Machine Disk) image format. The VMDK is the standalone virtual machine containing all the contents.
- Import the VMDK image into Google Cloud Compute Engine
- Create a VM instance from the image in Step 2
Please ensure the OS image being migrated is supported on Google Cloud. For a list of supported OS, look at https://cloud.google.com/compute/docs/images/os-details#import
Let’s look at the above process in detail. I will also share some of the pitfalls to avoid during the migration.
Create an AWS AMI for your EC2 instance and convert it to VMDK format
- Log in to the AWS dashboard. Select the EC2 instance that needs to be exported, and create an image for the required instance, as shown in the figure below.

- Verify the image is created by navigating to the AMI dashboard. In the figure shown below, wp_latest is the image created from the earlier step. Note down the AMI ID, which will be used in a later step.

- Next, create an S3 bucket to store the VMDK image that we will convert from the AMI image created in the earlier setup. Provide the required permissions as mentioned on the AWS website – https://docs.aws.amazon.com/vm-import/latest/userguide/required-permissions.html
I have created the following bucket – my-bk and a folder called exports within it, as shown below.

- Next, run the following command to create a VMDK image from the AMI image using the aws command line tool. This assumes you have configured the aws command line interface. If not, configure via this link – https://docs.aws.amazon.com/cli/latest/userguide/cli-chap-configure.html.
> aws ec2 export-image –image-id ami-0eae3a2d4436a2052 –disk-image-format VMDK –s3-export-location S3Bucket=my-bk,S3Prefix=exports/
In the above command, replace ami-0eae3a2d4436a2052 with your AMI image id from Step 2. Replace my-bk and exports with the bucket name and folder you created in Step 3.
When you run the command, you will get the following output.

Note down the ExportImageTaskId. We would use it in the next step to track the
progress of this task.
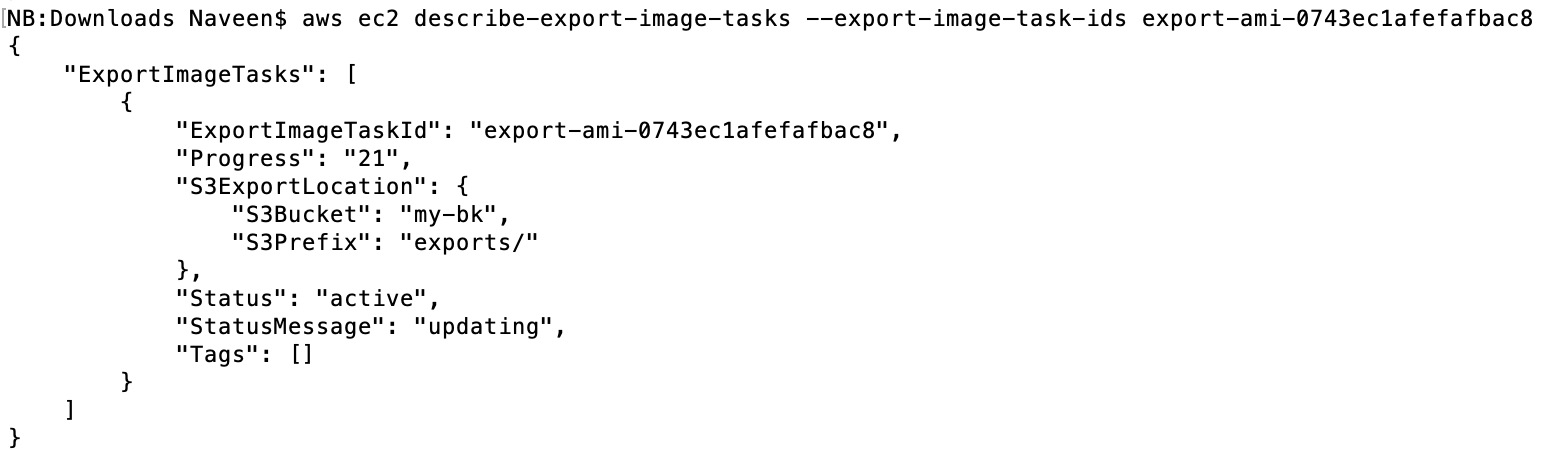
- Converting the image to VMDK format took around 4 hrs for my image. You can track the progress with the following command.
> aws ec2 describe-export-image-tasks –export-image-task-ids export-ami-0743ec1afefafbac8
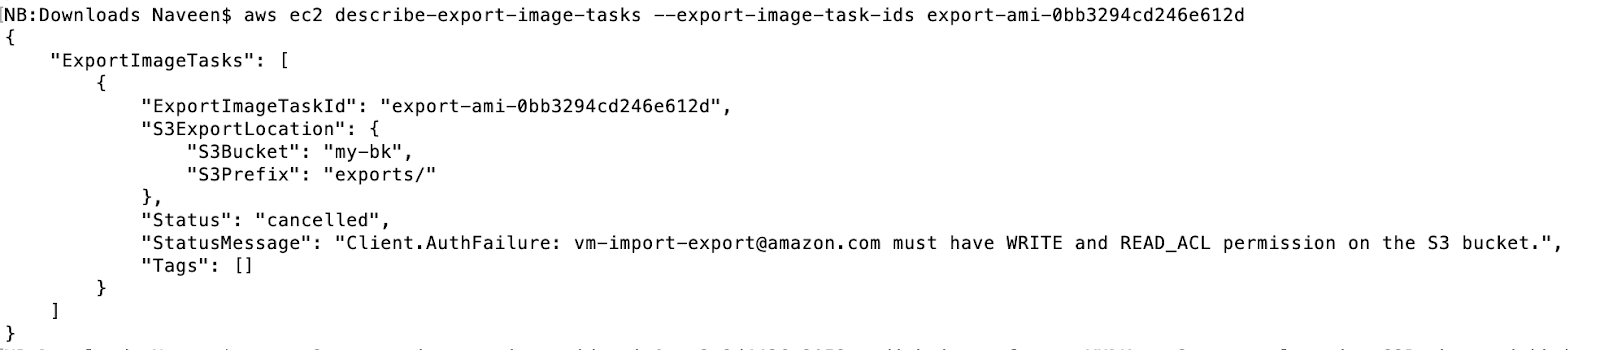
- For the above command, after 4 hrs, initially, I got an error that the required permission to the S3 bucket was missing. It would be good to have the script check the permission before the conversion process starts.
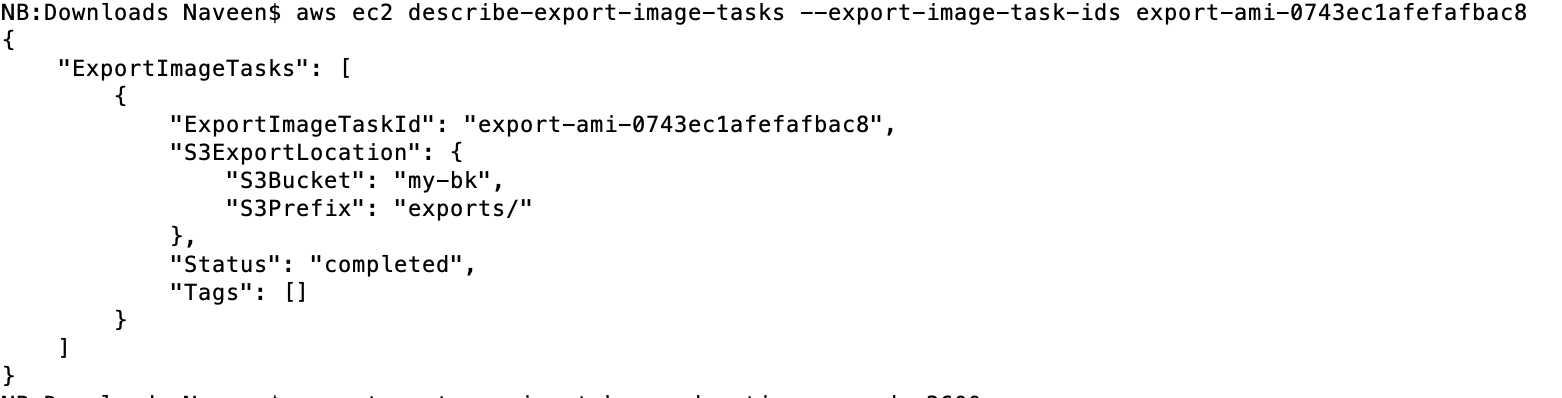
- If the export image gets successfully completed, you would get the status as completed, as shown below.
You can verify the VMDK image in the S3 bucket.

Note down the S3 bucket path and the name of the file. Next, we will import the VMDK image into Google Cloud.
2. Import the VMDK image into Google Cloud Compute Engine.
In this step, we would import the VMDK image into Google Cloud Compute Engine
image format using the cloud compute images import command.
- First, set the project where you want to import the image
> gcloud config set project experimental-310506.
Replace experimental-310506 with your project name
- Next, generate the AWS IAM temporary credentials that would be used to access the S3 bucket to get the VMDK file from the google cloud import command (Step 3)
> aws sts get-session-token –duration-seconds 3600.
You will get the following output.

The above values will be used in the next step
- Next run the following command
gcloud beta compute images import wp-ami-image \
> –aws-region=us-east-1 \
> –aws-access-key-id=XXX5WZMMPXXL \
> –aws-secret-access-key=XXX7KrMTNMO \
> –aws-session-token=FZhSQ1113XCCXXXXQ==\
> –aws-source-ami-file-path=s3://my-bk/exports/export-ami-..ac8.vmdk\
> –os=ubuntu-2004
Replace aws-access-key-id, aws-secret-access-key and aws-session-token
from values from above step. Replace us-east-1 with your AWS region (This
should not be required as we are specifying the direct file path to VMDK).
Replace ubuntu-2004 with your environment (See a list of supported OS
environments for migration at – https://cloud.google.com/compute/docs/images/os-details#import)
Replace s3://my-bk/exports/export-ami-..ac8.vmdk with your path where
VMDK file is stored (from Step 7 earlier)
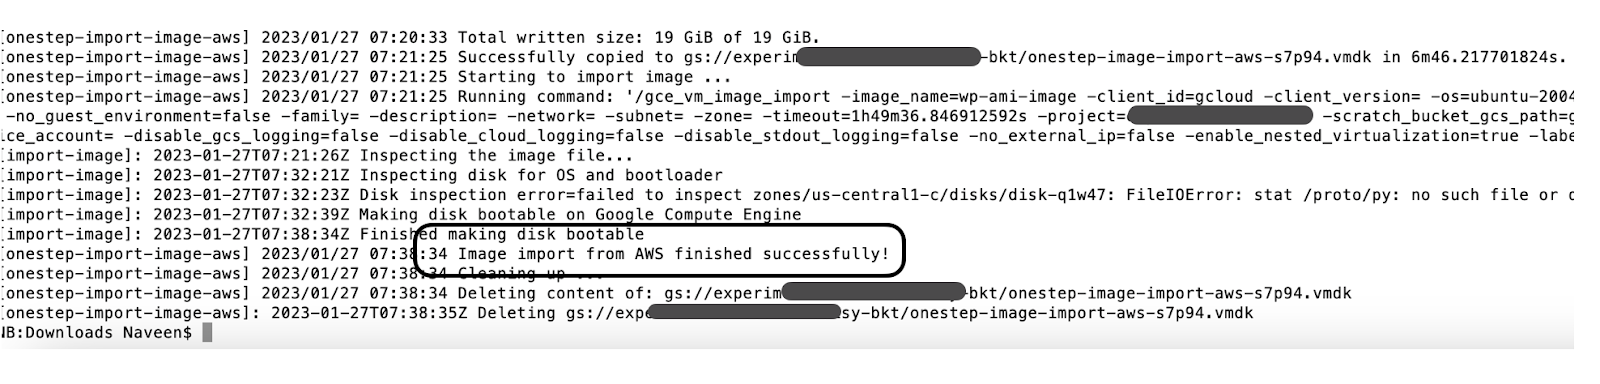
After you run the command, you will get the following output.

The above process took around 30 mins for me. You should see the message
Import from AWS finished successfully.
Create a VM instance from the imported image
Go to the Google Cloud console and select your project. Navigate to Compute
Engine -> Storage -> Images.
You should find the image imported (wp-ami-image) in the list. Click create
an instance to launch the image.

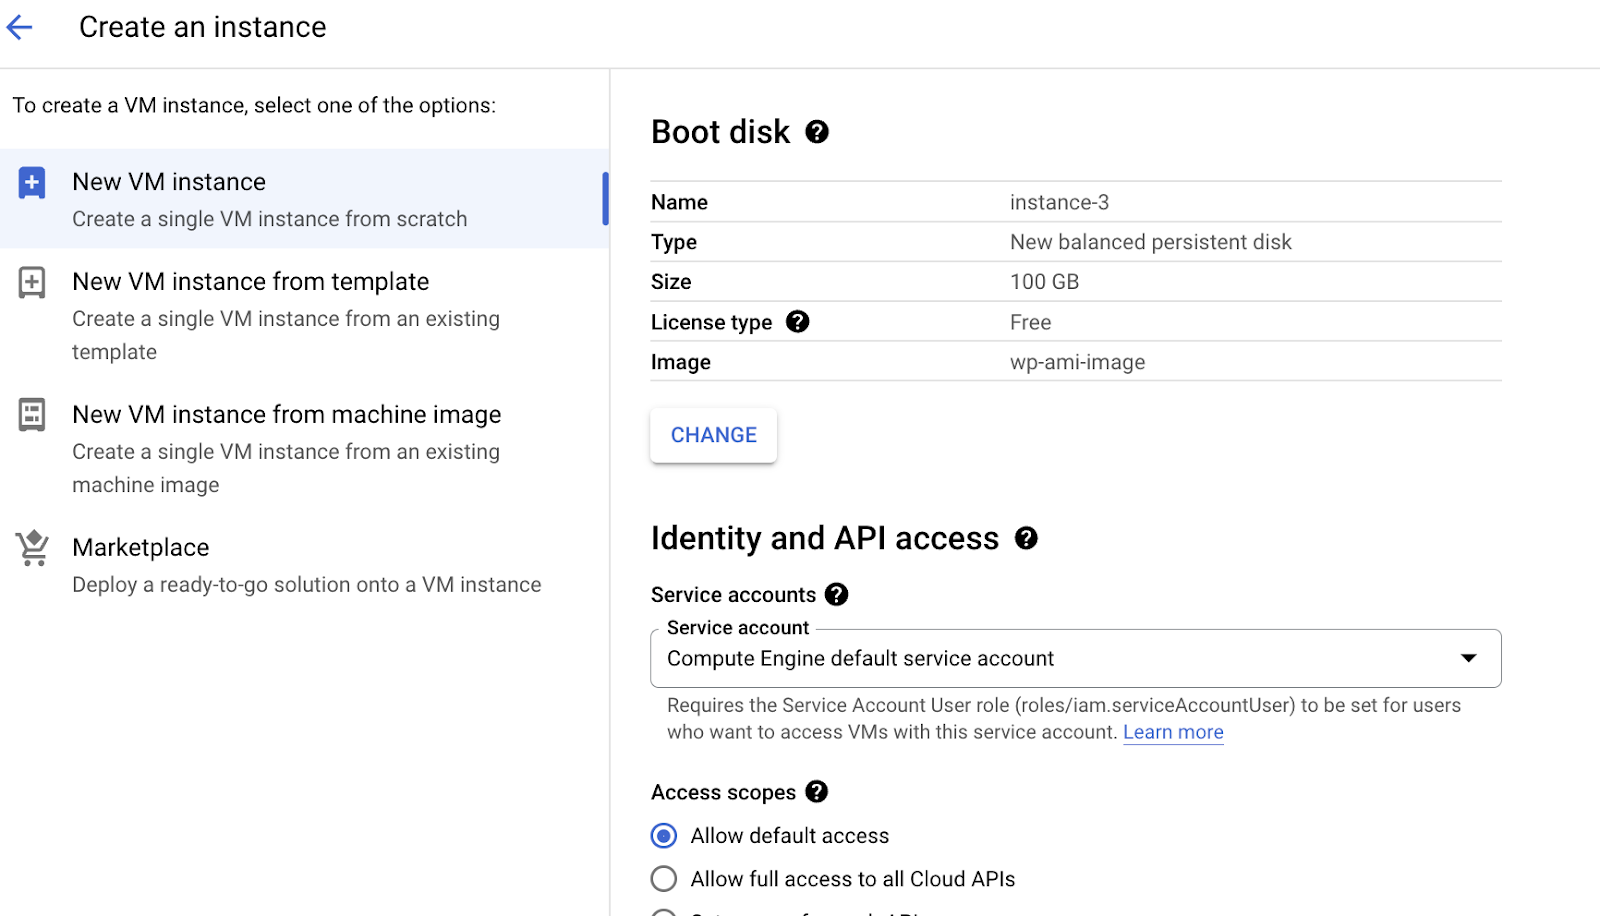
Next, you can create the instance as per the normal process. You will see the
boot disk image type is wp-aim-image.
This completed the process of migrating a single EC2 instance to Google
Cloud.


