In this article, we would invoke the microservices that was deployed in earlier article. You can use a tool like CURL to invoke the echo micro service as shown below.
> curl –request POST \
–header “content-type:application/json” \
–data ‘{“message”:”hello echo”}’ \
“https://apis.navveenbalani.dev/echo?key=AIzaSyC0m7d4cc-jOwJ“
(replace AIzaSyC0m7d4cc-jOwJ with your endpoint key)
You would see the response message being printed in the console.
Next, execute the fetchWebsite service.
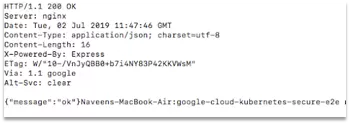
> curl -i https://apis.navveenbalani.dev/fetchWebsite?key=AIzaSyC0m7d4cc-jOwJ
You would see the message “ok’ being printed on the console, denoting that your service can access internet (external IP) from your private kubernetes cluster through Cloud NAT.
Figure 27: Output of curl invocation
Next, we would whitelist the IPs that can access our service. We would use Cloud Armor and configure it with our kubernetes cluster.
Configure Cloud Armor
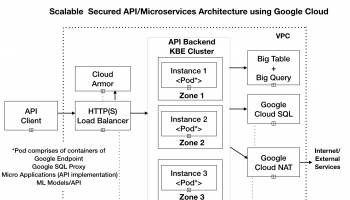
Google Cloud Armor works with Global HTTP(S) Load Balancer to provide built-in defenses against infrastructure DDoS attacks. It provides IP and geo-based access control and a set of rich rules (currently in alpha) to
Let’s create Cloud Armor configuration for our application. To demonstrate, we would use IP whitelisting to all IPs for now and invoke our application. We would later change the configuration to deny all IP address that should provide an unauthorized error.
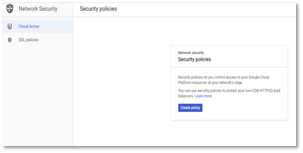
Go to Network Security > Click Cloud Armor -> Click Create Policy
Figure 28: Cloud Armor -> Create Policy
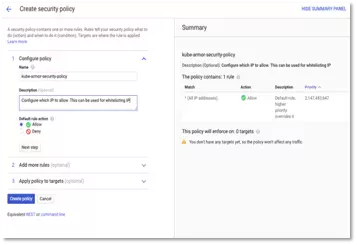
- Enter the name in the policy and select Allow in rule action.
Figure 29: Cloud Armor -> Policy Details
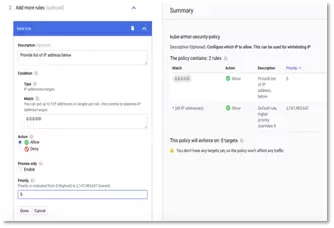
- Click Next Step and enter ip – 0.0.0.0/0 (to allow all ip address) in the match and priority as 0 (executed first) as shown in figure below.
Figure 30: Cloud Armor -> Policy Details -> IP Details
- Click Done to create the configuration. Wait for a couple of minutes for changes to be effective.
- Next, we would add the configuration created above to our kubernetes cluster. We need to create a BackendConfig as shown below which references the “kube-armor-security-policy” created earlier and later add the BackendConfig configuration to our service configuration.
apiVersion: cloud.google.com/v1beta1
kind: BackendConfig
metadata:
  namespace: default
  name: kube-armor-config
spec:
  securityPolicy:
    name: "kube-armor-security-policy"
Run the command to create the backend configuration.
> kubectl apply -f kube-backend-armor-gcp.yaml
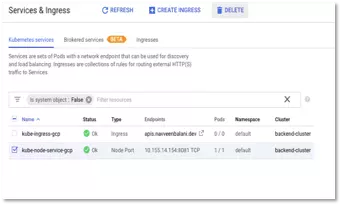
- Then, delete the existing kube-node-service-gcp by navigating to Kubernetes Engine > Services & Ingress in cloud console. We would create a new configuration with the cloud armor backend configuration created in the earlier step.
Figure 31: Service & Ingress -> Select & Delete
- Afterward, run the kube-backend-service-node-armor-gcp.yaml file. The contents of the file are the same as the kube-backend-service-node-gcp.yaml file with the additional backend-config annotation that references the kube-armor-config created in the earlier step.
metadata:
  name:  kube-node-service-gcp
  labels:
    apps: backend-gcp
  annotations:
    beta.cloud.google.com/backend-config: '{"ports": {"8081":"kube-armor-config"}}'
spec:
  type: NodePort
  selector:
    apps: backend-gcp
  ports:
  - port: 8081
    targetPort: 8081
Execute the command –
> kubectl apply -f kube-backend-service-node-armor-gcp.yaml
After execution, wait for kube-ingress-gcp to be back in green state.
Test the Microservices with Cloud Armor
Next, test the microservices again with the new configuration.
> curl -i https://apis.navveenbalani.dev/fetchWebsite?key=AIzaSyC0m7d4cc-jOwJ
You should see the message “ok’ being printed on the console.
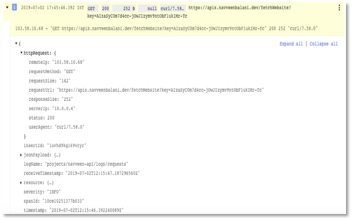
Next, go to Cloud Console -> Network Security -> Cloud Armor and click on the kube-armor-security-policy. On the kube-armor-security-policy page, click Logs to view the request logs. You can inspect each incoming request (headers, message, ip address etc.) in detail by inspecting the logs.
Figure 32: Cloud Armor Logs
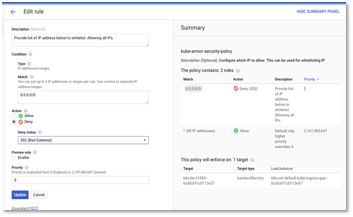
To test out IP whitelisting, modify the existing Kube-armor-security-policy
Policy. Click on Edit rule and select deny instead of allow as shown below. Then, click update.
Figure 33: Cloud Armor -> Policy Details – > Deny All
Wait for a few minutes for changes to be effective.
Next, execute the fetchWebsite service.
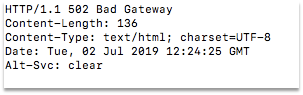
> curl -i https://apis.navveenbalani.dev/fetchWebsite?key=AIzaSyC0m7d4cc-jOwJ
You should see 502 Bad Gateway as a response as shown below.
Figure 34: Bad Gateway error
With this, we have tested IP whitelisting. Change the configuration back to allow all IP Addresses. Click here for next section.


